This is a post from my personal blog, but since it applies to food I thought I would post it here, too.
Enjoy!
-------
It happens to all of us (perhaps a bit more often to me?).
We think, hey! Let`s be healthy! And then we make the resolution to EAT SALADS. Because they are healthy AND yummy, right?
So we buy lettuce.
And sometimes we use it. And sometimes we don`t. And sometimes we forget about it.
And then, after what seems like a short amount of time, we find out lettuce all droopy and sad. And we mourn, and throw it out.
But THAT is where you are wrong!!
I use this simple method to revitilize my lettuce, and I have kept lettuce for... probably way longer than I should have. But wilty lettuce isn`t poisonous (or if it is, either it is a weak poison or I have a strong tolerance, because I have eaten a lot of wilty and post-wilty greens).
Step 1: Take your wilty lettuce.
Step 2: Put it in a bag.
Step 3: Put a bit of water in the bag.
Step 4: Leave it in to the fridge.
Viola. Your lettuce will suck in the water and return to crispy, tasty, salad-bound deliciousness.
Friday, March 23, 2012

Wednesday, March 14, 2012
Nisemono Tsukemono - "Fake" Japanese Pickles
Do you like pickles? Honestly, I am not much of a fan. I have never liked pickles on my hamburgers, or hot dogs, or sandwiches, or basically anything else. Right before I came to Japan, I started to develope a liking for diced sweet pickles in my Tuna-fish sandwiches. But that was the only acceptable place for them, in my opinion.
Japanese pickles, however, are a different breed. According to Wikipedia, Japanese pickles, or Tsukemono, are usually "pickled in salt or brine," rather than vinegar. This gives it a very different taste from dill pickles back home. I tend to like Japanese pickles much better. They also pickle many other vegetables- daikon (Large, white radish), cucumber, turnips, cabbage, ginger, plums... A wide variety of tasty, crunchy pickles to dine upon.
Everyday Harumi has a quick and easy recipe for pickles that uses a mix of rice vinegar (I know, I know, I just spent a paragraph telling you how Japanese pickles didn`t use vinegar! I`m sorry, I will do better next time!), soy sauce, and sesame oil.
Prep was super easy. A few interesting tips: rub the cucumbers with salt for a minute or two. This helps remove any bitter flavors and helps the cucs maintain a lovely color. Also, remove the center seeds with a spoon. Add the broken-up/sliced up cucs to a bag along with some julienned ginger and the vinegar-sauce mix and let sit in the fridge for 2-3 hours. Pickles will keep for 2-3 days.
Overall, I was pleased with this recipe. Despite the use of vinegar, the pickles had a far more Japanese-pickle flavor. I did, however, feel that the soy-sauce/sesame oil ratio was a bit high. Next time I will experiment with less of those.
Also, next on the pickle-agenda... perhaps next time I will attempt something more like THIS.
Japanese pickles, however, are a different breed. According to Wikipedia, Japanese pickles, or Tsukemono, are usually "pickled in salt or brine," rather than vinegar. This gives it a very different taste from dill pickles back home. I tend to like Japanese pickles much better. They also pickle many other vegetables- daikon (Large, white radish), cucumber, turnips, cabbage, ginger, plums... A wide variety of tasty, crunchy pickles to dine upon.
Everyday Harumi has a quick and easy recipe for pickles that uses a mix of rice vinegar (I know, I know, I just spent a paragraph telling you how Japanese pickles didn`t use vinegar! I`m sorry, I will do better next time!), soy sauce, and sesame oil.
Prep was super easy. A few interesting tips: rub the cucumbers with salt for a minute or two. This helps remove any bitter flavors and helps the cucs maintain a lovely color. Also, remove the center seeds with a spoon. Add the broken-up/sliced up cucs to a bag along with some julienned ginger and the vinegar-sauce mix and let sit in the fridge for 2-3 hours. Pickles will keep for 2-3 days.
Overall, I was pleased with this recipe. Despite the use of vinegar, the pickles had a far more Japanese-pickle flavor. I did, however, feel that the soy-sauce/sesame oil ratio was a bit high. Next time I will experiment with less of those.
Also, next on the pickle-agenda... perhaps next time I will attempt something more like THIS.
Rice and Soy-Flavored Pork
I am going to have to change the name of this blog to "Cooking Everyday with Harumi" or something if I keep this up. Would you believe she is not even paying me to advertise her book? Guess that shows how much I am liking it!
Last night I made another recipe from the book linked above: Rice and Soy-Flavored Pork (any editing people out there? Should that flavor be capitalized? It looked weird lowercase).
It was a super simple recipe, and very interesting to me. Instead of water, she cooks the rice with dashi (fish stock!) mixed with a little soy sauce, mirin, and sugar. I`d never done something like that before, and the result was intriguing. In the end, I decided that, personally, I would like this recipe better with just plain rice (as the pork and carrots are cooked in a very similarly flavored sauce, and together it seemed a little too much), or perhaps cooked with vegetable or chicken broth instead.
The pork is sliced thinly (she suggested 1cm) and cooked in a fry pan with skinned and sliced carrots in a soy-sauce/mirin/sugar sauce. This sort of sauce is used in a lot of Japanese recipes, I`ve found. I really like the flavor, but do be careful not to cook too long/too high or it will burn. I was impatient last night and burned the sauce a little. It wasn`t disgusting or anything, but it definitely would have been better if I had avoided that.
Harumi gives some good advice on how to slice meat thinly, as well. In Japan, it is easy to find pork and beef sliced as thinly as bacon is. It`s super convenient and delicious. But in America, at least, it is nigh impossible to find it sliced so. Harumi suggests putting the meat in the freezer for a bit-- until it firms up but isn`t frozen through-- and then slicing it. I did this once with a gingersnap cookie recipe and was amazed at the slivers I was able to slice off. Hope this method can help you with your thin-meat needs!!
In any case, it was a simple, tasty meal that I will definitely use again. Perhaps next time, I will add some ginger or garlic to the pork, and use a different liquid for the rice, though.
Last night I made another recipe from the book linked above: Rice and Soy-Flavored Pork (any editing people out there? Should that flavor be capitalized? It looked weird lowercase).
It was a super simple recipe, and very interesting to me. Instead of water, she cooks the rice with dashi (fish stock!) mixed with a little soy sauce, mirin, and sugar. I`d never done something like that before, and the result was intriguing. In the end, I decided that, personally, I would like this recipe better with just plain rice (as the pork and carrots are cooked in a very similarly flavored sauce, and together it seemed a little too much), or perhaps cooked with vegetable or chicken broth instead.
The pork is sliced thinly (she suggested 1cm) and cooked in a fry pan with skinned and sliced carrots in a soy-sauce/mirin/sugar sauce. This sort of sauce is used in a lot of Japanese recipes, I`ve found. I really like the flavor, but do be careful not to cook too long/too high or it will burn. I was impatient last night and burned the sauce a little. It wasn`t disgusting or anything, but it definitely would have been better if I had avoided that.
Harumi gives some good advice on how to slice meat thinly, as well. In Japan, it is easy to find pork and beef sliced as thinly as bacon is. It`s super convenient and delicious. But in America, at least, it is nigh impossible to find it sliced so. Harumi suggests putting the meat in the freezer for a bit-- until it firms up but isn`t frozen through-- and then slicing it. I did this once with a gingersnap cookie recipe and was amazed at the slivers I was able to slice off. Hope this method can help you with your thin-meat needs!!
In any case, it was a simple, tasty meal that I will definitely use again. Perhaps next time, I will add some ginger or garlic to the pork, and use a different liquid for the rice, though.
Tuesday, March 13, 2012
Chicken and Celery Salad
This is another recipe from Everyday Harumi that blew my mind with how AMAZINGLY TASTY is was! I loved the contrast of the crispy celery with the chicken, and the flavors are fantastic together! The tangy, mayonnaise dressing with the garlic-soy sauce marinate for the chicken, topped with some fresh black pepper. Mmm. I am salivating just thinking about it.
Also, the marinate was so tasty you could use it for all sorts of other recipes, too.
And so I give you...
Chicken and Celery Salad
serves 4
300g celery (Or more. I think the celery-dressing ratio was a bit low)
300g skinless chicken breasts or mini fillets
1/2 tsp grated garlic
1-2 Tbsp light soy sauce (usukuchi)
1/2 Tbsp sunflower or vegetable oil (optional)
For the dressing
100g mayonnaise (Japanese Kyupi if you can get it)
1 Tbsp chicken stock
1-2 Tbsp white wine (I sub`d vinegar and sugar. (actually I didn't have regular vinegar so I sub`d rice vinegar and sugar... lol))
Light soy sauce - to taste
Wasabi - to taste (I hate wasabi so I didn't use any)
Salt and pepper - to season
pepper- to serve
1. Remove any stringy parts of the celery (I actually didn`t do this. Partially because I didn`t have a lot of celery. Partially because I am lazy. And partially because I actually like the stringy parts of the celery). Chop into 5cm-long strips and put into iced water for a couple of minutes to crisp, then drain.
(I cut the celery into 5-cm-long pieces and then cut those poses long-wise to make think splinters. That`s what it looked like in the pictures.)
2. Remove any gristle from the chicken then season by mixing the garlic with the light soy sauce and marinate for 5-6 minutes.
3. Cook the chicken in a non-stick pan until just cooked through. If using a regulat frying pan, use a little oil when cooking the chicken
4. When cool, shred the chicken into thin strips by hand and mix with the celery (When she says by hand, I think she literally means by hand. I tried shredding it with two forks and it was tough and took ages. Then I just grabbed it and started tearing it up and it worked great haha)
5. To make the dressing: mix the mayonnaise with the chicken stock and white wine then add the light soy sauce and wasabi, according to personal taste, and finally season with salt and pepper.
6. Dress the chicken and celery and put in a serving dish. Sprinkle pepper on top and serve. Please take care with the presentation of this salad, fluffing it up as much as possible.
And there it is. Super-duper-fantastic tasty. I did the order a little differently; I cooked the chicken first, and then did the celery while it cooled, and soaked the celery in the ice water while I shredded the chicken and made the dressing.
Anyway, hope you enjoy it! And srsly, check out her book. So many good recipes in there!
Ciao!
Also, the marinate was so tasty you could use it for all sorts of other recipes, too.
And so I give you...
Chicken and Celery Salad
serves 4
300g celery (Or more. I think the celery-dressing ratio was a bit low)
300g skinless chicken breasts or mini fillets
1/2 tsp grated garlic
1-2 Tbsp light soy sauce (usukuchi)
1/2 Tbsp sunflower or vegetable oil (optional)
For the dressing
100g mayonnaise (Japanese Kyupi if you can get it)
1 Tbsp chicken stock
1-2 Tbsp white wine (I sub`d vinegar and sugar. (actually I didn't have regular vinegar so I sub`d rice vinegar and sugar... lol))
Light soy sauce - to taste
Wasabi - to taste (I hate wasabi so I didn't use any)
Salt and pepper - to season
pepper- to serve
1. Remove any stringy parts of the celery (I actually didn`t do this. Partially because I didn`t have a lot of celery. Partially because I am lazy. And partially because I actually like the stringy parts of the celery). Chop into 5cm-long strips and put into iced water for a couple of minutes to crisp, then drain.
(I cut the celery into 5-cm-long pieces and then cut those poses long-wise to make think splinters. That`s what it looked like in the pictures.)
2. Remove any gristle from the chicken then season by mixing the garlic with the light soy sauce and marinate for 5-6 minutes.
3. Cook the chicken in a non-stick pan until just cooked through. If using a regulat frying pan, use a little oil when cooking the chicken
4. When cool, shred the chicken into thin strips by hand and mix with the celery (When she says by hand, I think she literally means by hand. I tried shredding it with two forks and it was tough and took ages. Then I just grabbed it and started tearing it up and it worked great haha)
5. To make the dressing: mix the mayonnaise with the chicken stock and white wine then add the light soy sauce and wasabi, according to personal taste, and finally season with salt and pepper.
6. Dress the chicken and celery and put in a serving dish. Sprinkle pepper on top and serve. Please take care with the presentation of this salad, fluffing it up as much as possible.
And there it is. Super-duper-fantastic tasty. I did the order a little differently; I cooked the chicken first, and then did the celery while it cooled, and soaked the celery in the ice water while I shredded the chicken and made the dressing.
Anyway, hope you enjoy it! And srsly, check out her book. So many good recipes in there!
Ciao!
Saba Soboro (Flaked Mackerel with Vegetables)
Hello the internet! Jessica here, signing in from frozen Hokkaido! I recently ordered a Japanese cookbook written in English- Everyday Harumi. Because it is a copyrighted book, I don`t plan on sharing many recipes from it, but I do want to share what I make, how I liked it, and even provide an alternative recipe from the depths of the internet. However, I have really enjoyed this book so far, and already have many recipes I`m planning to try.
And so, without ado:
Saba Soboro or Flaked Mackerel with Vegetables
I am sort of picky about fish. Maybe it is because I grew up eating freshly caught trout and Salmon my dad brought back from Alaska. Even being in Japan, where fish are prized for being fresh, I am still a little nervous to try cooking with fish (part of this may be because I doubt I know how to cook it correctly). That being said, Saba Soboro was not my favorite dish, but it was still fairly tasty. To me, the flavor was a little shallow. I felt like it was lacking something, but I don`t know what.
It was tasty though-- using onions, carrots, and shiitake mushrooms, the flaked fish, and ginger, soy sauce, mirin, sake, sugar, and miso sauce for flavoring. It was a simple recipe, although deboning and skinning the fish was a time-consuming, frustrating process for me. It also takes time to peel/dice the vegetables, but all-in-all straight forward.
Here is a recipe for Saba Soboro from Cookpad:
And so, without ado:
Saba Soboro or Flaked Mackerel with Vegetables
I am sort of picky about fish. Maybe it is because I grew up eating freshly caught trout and Salmon my dad brought back from Alaska. Even being in Japan, where fish are prized for being fresh, I am still a little nervous to try cooking with fish (part of this may be because I doubt I know how to cook it correctly). That being said, Saba Soboro was not my favorite dish, but it was still fairly tasty. To me, the flavor was a little shallow. I felt like it was lacking something, but I don`t know what.
It was tasty though-- using onions, carrots, and shiitake mushrooms, the flaked fish, and ginger, soy sauce, mirin, sake, sugar, and miso sauce for flavoring. It was a simple recipe, although deboning and skinning the fish was a time-consuming, frustrating process for me. It also takes time to peel/dice the vegetables, but all-in-all straight forward.
Here is a recipe for Saba Soboro from Cookpad:
こんなランチの日もいいです♪。そぼろに残り野菜を加えてもOK。簡単で、3、4日冷蔵庫でストックも可能♪娘ちゃん大好物
You can also use this for lunches, and use other vegetables (whatever you have left in your refrigerator). Can store in the fridge for 3-4 days. Her daughter loves this recipe.
材料(4人分 ) Serves 4
さば(3枚におろす) 3 pieces of mackerel; one tail
1尾
鶏ミンチ
100g
100g minced chicken (My recipe did not call for chicken)
干ししいたけ
3個
3 dried shiitake mushrooms (can also use fresh; I used about 6 fresh ones)
青ねぎ
1本
1 green onion
酒
大さじ2+1
2 + 1 tablespoons of sake
A:醤油
大さじ3
3 Tbsp Soy sauce
A:砂糖
大さじ3
3 Tbsp sugar
A:干ししいたけの戻し汁
大さじ3
3 tbsp soaking liquid for dried Shiitake (omit if using fresh)
A:生姜(すりおろし・みじん切りOK)
ひとかけら(大さじ1)
1 Tbsp chopped or grated ginger
A:塩
ひとつまみ
Pinch of salt
A:味噌
小さじ1
1 tsp miso1
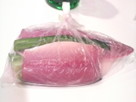 ビニ-ル袋に3枚におろしたサバと大さじ2のお酒、ネギを入れて1時間程おいておく。我が家は前日の夜からしてます。
- Put the mackerel, 2 Tbsp sake, and green onions in a bag. Marinate for 1 hour. I think the last sentence says you can put in it overnight?
2
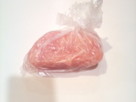 鶏ミンチもお酒大さじ1と一緒入れサバと同じくらいの時間おいておく。この1.2の下準備で臭みやパサパサ感をなくします。
- Put the minced chicken and 1 Tbsp of sake into a bag and marinate for the same amount of time as the mackerel. This helps eliminate odors and helps it flake more.
3
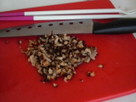 干ししいたけはかぶるくらいの少ない水でもどしておきます。(こちらも前日からやっておくと便利)
- Reconstitute the shiitake mushrooms (you can also do this the night before)
4
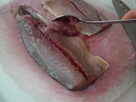 袋からサバのみ取り出してスプ-ンなどでぼろぼろっと、身をとります。中心部の骨のあたりはそのまま残すと綺麗に身だけとれます
- Take the mackerel out of the bag and remove the flesh from the skin. (The picture here suggests you do this with a spoon, as did my book. But I think I did it wrong. Anyway, GOOD LUCK TO YOU HERE). To avoid bones, it looks like they are saying to scrape the flesh on either side of the bones in the center? In any case, you don`t want bones.
5
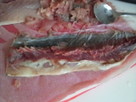 こうやって全体の身をとったら、サバの身と軽く水気をきった鶏ミンチをボ-ルかタッパにいれます。全体で約300gでした
- Uhm. I think this is saying that all together you should have about 300 grams of mackerel and chicken?
6
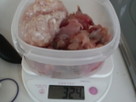 5にAの調味量を全て入れお箸などでぐるぐるまぜます。練ってはいけません!これポイント!混ぜた状態で5分ほどおいたら・・
- Mix seasoning (soy sauce, miso, etc) with the chicken and fish. (I think)
7
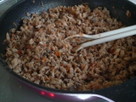 フライパンに6とみじんぎりにした干ししいたけを入れ弱火~中火でお箸でまぜながら、身をほぐしながら丁寧にそぼろ状にしていく
- Cook the fish and vegetables in a frying pan. Yum yum yum
8
- 全体の水けがなくなってきたら火を止めてできあがり♪今回は干ししいたけと一緒に残り野菜の人参を入れてます
- They also added carrots and stuff.
コツ・ポイント
POINT TIP
サバは臭みがあります。それをとるにはしっかりお酒に漬けこんでおくことと、生姜や味噌がポイントになります♪こうするとサバの臭みが随分消えてとっても美味しいサバそぼろができますよ。色々な残り野菜をみじん切りにして加えてもOK。
Mackerel is smelly. That is why she marinates it in sake. Also, you can add other vegetables to make it nummy numsters.
OKAY. So I got into some really hardcore paraphrasing at the end. Or maybe from the middle. ANYWAY. Hope that helps.
Harumi`s recipe has a slightly different order. Instead of mixing the seasonings with the meat, she heats a little oil in the fry-pan and adds the ginger and fish. Once the fish starts to brown, she adds in the vegetables. Then she adds the sauce/seasoning mix and cooks that until the liquid is absorbed.
My mackerel was a little smelly. Next time I use it I will try marinating it in sake.
And of course, serve with fresh rice. Yum!
Wednesday, September 21, 2011
Cucumber Avacado Sandwiches
Okay, so they are not Japanese. But they are RIDICULOUSLY TASTY. And also vegetarian! I totally stole this simply, refreshing, delicious meal idea from Jeri.
Cucumber Avocado Sandwiches - Makes 2 sandwiches
1 ripe Avocado
1 cucumber, sliced
4 slices of bread
Ceasar dressing
Spread dressing on bread according to taste (I put a decent dollop on both slices of bread!)
Lay sliced cucumbers in a layer (or two) on the bread. Slice avocado and place on top of cucumbers. Place second piece of bread on top and - viola. Heaven!
Alternatives: You could also mash the avocado up and spread it on the bread. It would make it a little less messy to eat, I think, but I sort of like the randomness of slices.
Also, I usually cut my bread in half before I make these. It makes them easier to eat.
Cucumber Avocado Sandwiches - Makes 2 sandwiches
1 ripe Avocado
1 cucumber, sliced
4 slices of bread
Ceasar dressing
Spread dressing on bread according to taste (I put a decent dollop on both slices of bread!)
Lay sliced cucumbers in a layer (or two) on the bread. Slice avocado and place on top of cucumbers. Place second piece of bread on top and - viola. Heaven!
Alternatives: You could also mash the avocado up and spread it on the bread. It would make it a little less messy to eat, I think, but I sort of like the randomness of slices.
Also, I usually cut my bread in half before I make these. It makes them easier to eat.
Friday, September 9, 2011
Zaru Soba
An easy, cold, refreshing noodle dish that`s wonderful for a hot summer day. Soba noodles served cold and dipped in a separate sauce before eating. すっきり!

Zaru Soba Serves 2
1 bundle dry soba noodles
Tsuyu (can be bought premade or made yourself)
1 cup dashi
1/4 cup soy sauce
1/4 cup mirin
Green onions, sliced
Optional: nori, shredded into small strips, rayu, other spices and flavorings
To make Tsuyu:
Bring mirin to boil. Add soy sauce and dashi and bring to boil once again. Remove from heat and refridgerate until cold. Can be stored in the fridge for weeks.
Cook soba noodles according to directions. Drain and rinse with cold water until noodles are cold. Drain well. Top with nori, if desired.
Pour tsuyu into a separate, small container (tall contaniers work best; ie, Japanese teacup, etc). Put sliced green onions and any other flavorings into tsuyu.
To eat, take soba noodles, dip into the sauce, and then eat.
Delicious!

Zaru Soba Serves 2
1 bundle dry soba noodles
Tsuyu (can be bought premade or made yourself)
1 cup dashi
1/4 cup soy sauce
1/4 cup mirin
Green onions, sliced
Optional: nori, shredded into small strips, rayu, other spices and flavorings
To make Tsuyu:
Bring mirin to boil. Add soy sauce and dashi and bring to boil once again. Remove from heat and refridgerate until cold. Can be stored in the fridge for weeks.
Cook soba noodles according to directions. Drain and rinse with cold water until noodles are cold. Drain well. Top with nori, if desired.
Pour tsuyu into a separate, small container (tall contaniers work best; ie, Japanese teacup, etc). Put sliced green onions and any other flavorings into tsuyu.
To eat, take soba noodles, dip into the sauce, and then eat.
Delicious!
No-soup Udon with Mixed Veggies!
I sort of made this up on the spot, and didn`t really measure anything, but here is a vegetarian dish. Soy sauce and sugar make a sweet, thick sauce that goes well with the satsumaimo (purple sweet potato). Mix up this recipe with whatever vegetables you like (or whatever is on sale at your supermarket!!)

No-Soup Udon with Mixed Veggies Serves 2
1 package udon noodles (Pre-cooked or dry, whichever you prefer
Vegetables of your choice!
I used: 1.5 onions, 3 small green peppers, one red pepper, 1 medium satsumaimo (purple sweet potato!)
~1 Tbsp oil (does anyone actually measure oil for stir-frying? I sure don`t)
Soy sauce (I didn`t measure, maybe use about a cup?)
3 Tbsp Sugar
Salt to taste
Optional: red pepper flakes or other spices: black sesame seeds
If using dry noodles, cook then according to directions
Slice vegetables. For Satsumaimo, I recommend slicing at an angle, turning the potato 45, slicing again, etc. This should make chunky, stick-like potato wedges.
Heat oil in frying pan over high heat. Add onions, satsumaimo, and salt (salt helps brown vegetables by drawing out the moisture) and brown, apx 2~3 minutes. Add peppers and brown briefly if desired. Add soy sauce and reduce heat to medium. Cover and simmer until vegetables are tender and much of the liquid is gone. Uncover and add sugar. Cook uncovered for a few more minutes, then add noodles and toss to coat.
Top with black sesame seeds and serve warm.

No-Soup Udon with Mixed Veggies Serves 2
1 package udon noodles (Pre-cooked or dry, whichever you prefer
Vegetables of your choice!
I used: 1.5 onions, 3 small green peppers, one red pepper, 1 medium satsumaimo (purple sweet potato!)
~1 Tbsp oil (does anyone actually measure oil for stir-frying? I sure don`t)
Soy sauce (I didn`t measure, maybe use about a cup?)
3 Tbsp Sugar
Salt to taste
Optional: red pepper flakes or other spices: black sesame seeds
If using dry noodles, cook then according to directions
Slice vegetables. For Satsumaimo, I recommend slicing at an angle, turning the potato 45, slicing again, etc. This should make chunky, stick-like potato wedges.
Heat oil in frying pan over high heat. Add onions, satsumaimo, and salt (salt helps brown vegetables by drawing out the moisture) and brown, apx 2~3 minutes. Add peppers and brown briefly if desired. Add soy sauce and reduce heat to medium. Cover and simmer until vegetables are tender and much of the liquid is gone. Uncover and add sugar. Cook uncovered for a few more minutes, then add noodles and toss to coat.
Top with black sesame seeds and serve warm.
Thursday, August 11, 2011
So, What IS this Miso stuff??
Considering I just posted TWO miso-centered recipes, I thought I'd do a little research and share what it actually IS, for those who may be interested.

Miso is basically Soy beans. Soy beans and a mould culture, and sometimes another grain, such as rice or wheat. The beans are mixed with the culture and other grain and then fermented for a period of time from several months to several years. The length of fermenation affects the color, flavor, aroma, and color of Miso. (source)
My host family in Yokohama made their own Miso and fermented it for two years. It was phenomenal. So delicious! We would spread it on vegetables and eat it raw.

As you may notice in the picture above, there are different types of miso, too! Red miso and white miso are the most common I've seen.
Interested in making you own? Well luckily for you, I found this handy-dandy HOW-TO!!
Oh, and one more thing to remember when cooking with miso! Don't boil it!! Add it to your soups after everything is already cooked! If you boil miso it will ruin the flavor!
That's all for now!
--JeJira
Miso is basically Soy beans. Soy beans and a mould culture, and sometimes another grain, such as rice or wheat. The beans are mixed with the culture and other grain and then fermented for a period of time from several months to several years. The length of fermenation affects the color, flavor, aroma, and color of Miso. (source)
My host family in Yokohama made their own Miso and fermented it for two years. It was phenomenal. So delicious! We would spread it on vegetables and eat it raw.
As you may notice in the picture above, there are different types of miso, too! Red miso and white miso are the most common I've seen.
Interested in making you own? Well luckily for you, I found this handy-dandy HOW-TO!!
Oh, and one more thing to remember when cooking with miso! Don't boil it!! Add it to your soups after everything is already cooked! If you boil miso it will ruin the flavor!
That's all for now!
--JeJira
Miso Yaki (Broiled Miso [fish])
This tasty broiled fish is marinated prior to cooking and packs a nice flavor. If not overcooked, the fish should also be very tender and juicy.
A Note on Broiling:
Broiled fish is a huge part of the Japanese diet. Thus, every kitchen stove is equipped with a fish broiler. I'm not sure the best way to go about this in America, but baking the fish in an oven would probably be effective. Just research good temperatures to bake the type of fish you choose.
Miso Yaki - 2 servings (this makes quite a lot of marinade, so if you have less fish, cut back slightly or else a lot of miso will go to waste!)
250 g (8oz) White Fish (I used Hokke, which is a type of mackeral)
1/4 cup sugar
2 tsp vinegar
2/3 cup miso
1 tsp fresh ginger
1 tsp green onion - chopped
1/4 cup white wine (White grape juice can be substituted for wine. I couldn't find any white grape juice at my grocery store, so I got the wine)
Cut the fish in 1/2" fillets. Mix the remaining ingrediants and marinate the fish for apx 20 mins. Broil the fish, skin side down, turning once after apx 5-7 minutes.
Great when served with rice and Miso Soup!
**A Note on Broiling Fish!**
To those of you living in Japan (Shout-out to other JETs!), you most likely have a fish broiler in your stove!
 Ta-da!
There will probably be a metal cover on top of the stove. Remove it when broiling your fish! (I forgot this time-- OOPS!!!) Put a little bit of water in the bottom of the broiler pan to make cleaning up easier, and to help the fish stay moist while cooking.
Fish is done when it's nicely browned and flakes easily off of the bone.
And I guess if worse comes to worse, we're in Japan! They eat raw fish all the time over here!!
Cheers!
--JeJira
A Note on Broiling:
Broiled fish is a huge part of the Japanese diet. Thus, every kitchen stove is equipped with a fish broiler. I'm not sure the best way to go about this in America, but baking the fish in an oven would probably be effective. Just research good temperatures to bake the type of fish you choose.
Miso Yaki - 2 servings (this makes quite a lot of marinade, so if you have less fish, cut back slightly or else a lot of miso will go to waste!)
250 g (8oz) White Fish (I used Hokke, which is a type of mackeral)
1/4 cup sugar
2 tsp vinegar
2/3 cup miso
1 tsp fresh ginger
1 tsp green onion - chopped
1/4 cup white wine (White grape juice can be substituted for wine. I couldn't find any white grape juice at my grocery store, so I got the wine)
Cut the fish in 1/2" fillets. Mix the remaining ingrediants and marinate the fish for apx 20 mins. Broil the fish, skin side down, turning once after apx 5-7 minutes.
Great when served with rice and Miso Soup!
**A Note on Broiling Fish!**
To those of you living in Japan (Shout-out to other JETs!), you most likely have a fish broiler in your stove!
There will probably be a metal cover on top of the stove. Remove it when broiling your fish! (I forgot this time-- OOPS!!!) Put a little bit of water in the bottom of the broiler pan to make cleaning up easier, and to help the fish stay moist while cooking.
Fish is done when it's nicely browned and flakes easily off of the bone.
And I guess if worse comes to worse, we're in Japan! They eat raw fish all the time over here!!
Cheers!
--JeJira
Miso Shiru (Miso Soup)
This soup is a staple in the Japanese diet! It can be eaten at ANY meal (yes, that includes breakfast!) It's very simple, and very customize-able with different vegetables or meats or whatever else you have laying around!

Miso Shiru - 1 serving
1 cup dashi*
1 tsp Miso**
Any other vegetables/meat you want to add. Suggestions: Tofu, Moyashi (bean sprouts?), Spinach, Squash, etc etc etc. Anything you have should be good.
*Dashi is fish stock and can be found in several different forms. You can make your own, but I think most common (in America as least) are granules. You can also buy liquid dashi (at least in Japan). I used granules, and put in about 1/2 Tbsp per cup of water. Adjust this according to your taste
**Don't be frugal on the Miso. It's a super important flavor so make sure you buy something that is good quality.
Bowl the dashi. Add in any other ingredients and cook through. Using a ladle, move some broth to a separate bowl. Next we are going to add the Miso. BUT THERE IS A TRICK TO IT. Don't just dish the miso in! You will want some sort of strainer/ladle thing, like THIS:
 Put the miso in the strainer, and slowly dissolve it into the removed broth. When it is all mixed in, return broth to rest of soup and mix. Add more Miso to taste. Serve and top with green onions, if desired.
**BE CAREFUL!**
It is important that you NOT boil the soup AFTER you have added the miso. It will ruin the flavor!
Tonight, I made mine with Kabocha (squash), Moyashi, Tofu, and Komatsuna (I think?? some leafy green thing). It was supppper tasty.
--JeJira

Miso Shiru - 1 serving
1 cup dashi*
1 tsp Miso**
Any other vegetables/meat you want to add. Suggestions: Tofu, Moyashi (bean sprouts?), Spinach, Squash, etc etc etc. Anything you have should be good.
*Dashi is fish stock and can be found in several different forms. You can make your own, but I think most common (in America as least) are granules. You can also buy liquid dashi (at least in Japan). I used granules, and put in about 1/2 Tbsp per cup of water. Adjust this according to your taste
**Don't be frugal on the Miso. It's a super important flavor so make sure you buy something that is good quality.
Bowl the dashi. Add in any other ingredients and cook through. Using a ladle, move some broth to a separate bowl. Next we are going to add the Miso. BUT THERE IS A TRICK TO IT. Don't just dish the miso in! You will want some sort of strainer/ladle thing, like THIS:
**BE CAREFUL!**
It is important that you NOT boil the soup AFTER you have added the miso. It will ruin the flavor!
Tonight, I made mine with Kabocha (squash), Moyashi, Tofu, and Komatsuna (I think?? some leafy green thing). It was supppper tasty.
--JeJira
Wednesday, August 3, 2011
Shoga Yaki
Jessica here! This blog has been terribly ignored and for that I apologize. I figured since I am now LIVING in Japan, I really should post what I make to feed myself!
I made this the other night, so I will post pictures next time I make it (which will be soon. It was so good!)
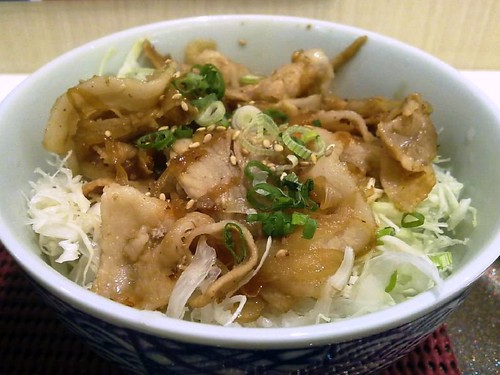 (This picture will be replaced with my own next time I make this!)
Shoga Yaki (Ginger (insert your favorite kind of meat here!)
~500g (20 oz?) Meat of your choice! (Pork is most common) (Sliced thin)
1/2 cup soy sauce
1/4 cup mirin
2 cloves of garlic (crushed)
2 Tbsp green onion (finely chopped) {Feel free to use more, though!)
1 tsp fresh ginger- grated
1 tsp oil
*Rice
Mix the soy sauce, mirin, garlic, onions, and ginger in a bowl.
{{*NOTE* I couldn't find cloves or garlic at the super, so I just used powdered. Of course, fresh garlic would be BEST but DO use fresh ginger. This is SHOGA (GINGER) yaki afterall. The ginger is the most important flavor. But it is also VERY STRONG! I used WAY too much the first time I made this. It was still good, but would have been much better with less ginger. A little goes a long way!}}
Pour over meat and marinate for 30-45 mins (Now is a good time to start your rice!!)
Heat oil in a pan. Add meat and brown over high heat. Add the marinade, cover, and cook over medium heat until meat is cooked through (time will vary depending on how thin your meat is cut). Serve with rice!
Serves 2
Enjoy!
I made this the other night, so I will post pictures next time I make it (which will be soon. It was so good!)
Shoga Yaki (Ginger (insert your favorite kind of meat here!)
~500g (20 oz?) Meat of your choice! (Pork is most common) (Sliced thin)
1/2 cup soy sauce
1/4 cup mirin
2 cloves of garlic (crushed)
2 Tbsp green onion (finely chopped) {Feel free to use more, though!)
1 tsp fresh ginger- grated
1 tsp oil
*Rice
Mix the soy sauce, mirin, garlic, onions, and ginger in a bowl.
{{*NOTE* I couldn't find cloves or garlic at the super, so I just used powdered. Of course, fresh garlic would be BEST but DO use fresh ginger. This is SHOGA (GINGER) yaki afterall. The ginger is the most important flavor. But it is also VERY STRONG! I used WAY too much the first time I made this. It was still good, but would have been much better with less ginger. A little goes a long way!}}
Pour over meat and marinate for 30-45 mins (Now is a good time to start your rice!!)
Heat oil in a pan. Add meat and brown over high heat. Add the marinade, cover, and cook over medium heat until meat is cooked through (time will vary depending on how thin your meat is cut). Serve with rice!
Serves 2
Enjoy!
Saturday, May 7, 2011
Butadon
Hana here. Today, wanting some donburi but not wanting oyakodon (since I've had it a lot this week already), I dug in to the freezer and found pork! "Buta" is the word for "pig", so "butadon" means "pig donburi". Butadon was my favourite to order when we all went to Yoshinoya for noshing in Japan.
Here's the recipe I used, halfed down. I was cooking for six people, so I used a lot. I'm just making this online recipe a bit smaller, since I'm sure most of you won't be feeding a bussful of teenagers. It's really quite easy, but takes some time.

Butadon - Japanese Pork Bowl
Ingredients:
One onion, thinly sliced
1 1/2 lb pork (I used boneless pork chops)
2 cups dashi
2 tsp sugar
2 1/2 Tbsp soy sauce
2 1/2 Tbsp mirin
1. With some oil in the pan, puts the onions in and cook until soft. These will be in here for awhile, so don't have the heat up very high. Medium should do just fine.
2. Thinly slice the pork (not paper-thin, but you don't want to be chewing on huge hunks of pork) and layer on top of the onions. Stir-fry until just lightly golden-brown.
3. Mix the sugar, soy sauce, and mirin into the dashi (I use about 2 Tbsp of dashi base per cup of boiling water, but you can up or lessen the amount of base depending on your tastes), then pour over the meat and onions.
4. Bring liquid to a boil, then turn down the heat and let it simmer until most of the liquid is gone. Stir around the meat and onions occasionally just to make sure it doesn't burn or stick.
5. Serve over rice.
6. Optional and definitely not needed: you can add some thinly-sliced scallions and/or sesame seeds as a topping.
So it's a lot like the oyakodon, but a bit tastier because of the fat in the pork. You can even put an egg on it if you want (the Japanese do that a lot with hot rice dishes), but for today, just introducing it to a bunch of picky teenagers, I didn't add any egg.
Please enjoy!
Here's the recipe I used, halfed down. I was cooking for six people, so I used a lot. I'm just making this online recipe a bit smaller, since I'm sure most of you won't be feeding a bussful of teenagers. It's really quite easy, but takes some time.

Butadon - Japanese Pork Bowl
Ingredients:
One onion, thinly sliced
1 1/2 lb pork (I used boneless pork chops)
2 cups dashi
2 tsp sugar
2 1/2 Tbsp soy sauce
2 1/2 Tbsp mirin
1. With some oil in the pan, puts the onions in and cook until soft. These will be in here for awhile, so don't have the heat up very high. Medium should do just fine.
2. Thinly slice the pork (not paper-thin, but you don't want to be chewing on huge hunks of pork) and layer on top of the onions. Stir-fry until just lightly golden-brown.
3. Mix the sugar, soy sauce, and mirin into the dashi (I use about 2 Tbsp of dashi base per cup of boiling water, but you can up or lessen the amount of base depending on your tastes), then pour over the meat and onions.
4. Bring liquid to a boil, then turn down the heat and let it simmer until most of the liquid is gone. Stir around the meat and onions occasionally just to make sure it doesn't burn or stick.
5. Serve over rice.
6. Optional and definitely not needed: you can add some thinly-sliced scallions and/or sesame seeds as a topping.
So it's a lot like the oyakodon, but a bit tastier because of the fat in the pork. You can even put an egg on it if you want (the Japanese do that a lot with hot rice dishes), but for today, just introducing it to a bunch of picky teenagers, I didn't add any egg.
Please enjoy!
Saturday, October 16, 2010
Melon Pan (Bread)
The long awaited recipe for Melon Pan is here! Melon Pan (or Melon Bread) is a Japanese pastry that is named after its shape, not because it has melon in it. Though if you can find melon extract you can add it if you like. Melon Pan is composed of a sweet bun with a layer of pastry on top. Once it's been cooked the pastry will crack a little causing the surface to look like the skin of a melon, hence its name. I got this recipe from a blog called Happy Home Baking. There are a lot of good recipes on here that you should check out. The recipe for Melon Pan is in grams so I am posting it with the conversions on here so you don't have to look them up yourself. But if you happen to have a food scale I am leaving it in grams also.

Japanese Melon Pan
Ingredients:
(makes about 12 buns)
Bread Dough:
300g bread flour (3 cups)
6g instant yeast (1 tsp)
36g caster sugar (3 TBS)
5g salt (1 tsp)
6g skim milk powder (2 1/2 tsp)
200g warm water (3/4 cup + 1 1/2 TBS) (37~38 deg C) (I didn't bother, just made sure water is not cold)
30g unsalted butter (2 TBS) (bring to room temperature)
Pastry layer
80g unsalted butter (5 1/2 TBS) (bring to room temperature)
90g caster sugar (1/4 cup + 3 1/2 TBS)
80g egg, lightly beaten (1/4 cup + 1 1/2 TBS) (oh, I hate weighing eggs!)
200g cake flour (2 1/4 cup)
2g baking powder (1/2 tsp)
some melon extract (or vanilla extract) (I leave this out as I don't have this)
some caster sugar for dusting/coating
How I made them:
1. Sift bread flour, caster sugar, salt, milk powder into a mixing bowl. Add in instant yeast and mix the powdered mixture a little.
2. Add in warm water. DO NOT add in all the water at one go, leave a little bit so as to adjust the texture of the dough.
3. Mix the ingredients with hand and slowly form into a dough. Add the remaining water if it is too dry.
4. Transfer dough to work surface. Knead until the dough longer sticks to the work surface. This should take about less than 5 mins.
5. Flatten the dough and add in the butter. Continue to knead. Initially, the dough will be very oily, after a few kneads, the butter will be absorbed by the dough. Continue to knead until the dough no longer feel sticky to your hand and will not stick to the work surface. This should take about 15 to 20 mins.
6. Place dough in a lightly greased (with butter) bowl, cover with cling wrap and let proof for about one hour, or until double in bulk.
7. While the dough is proofing, prepare the pastry layer. With an electric mixer, beat butter and sugar until mixture turns pale.
8. Add in a few drops of melon extract if desired.
9. Add in lightly beaten eggs in 3 addition. Beat well after each addition.
10. Sift over cake flour and baking powder. Mix with a spatula until flour mixture is fully incorporate. Divide into 12 portions, about 35~40g each. For the chocolate chips version, wrapped some chocolate chips into each pastry dough. (Feel free to experiment. I like adding shredded coconut into mine.) Place in a tray and let the dough chill in the fridge for at least 30 mins.
11. Punch out the gas in the bread dough and divide into 12 portion, about 45g each. Roll into rounds. Cover with a damp cloth or cling wrap and let the dough relax for 10mins.
12. Remove chilled pastry dough from the fridge. Roll out each dough in between 2 layers of cling wraps (I used clear plastic bags). Roll the bread dough again into rounds again. Remove the top layer of the cling wrap and place the bread dough onto the pastry dough. With the bottom layer of the cling wrap still intact, wrap the pastry dough around the bread dough. Carefully remove the bottom layer of the cling wrap, at the same time, smoothing the edges of the pastry dough. NOTE: DO NOT cover the Entire bread dough with the pastry dough. Leave the bottom 2 ~ 3 cm uncovered. The dough needs the space to expand, otherwise the pastry dough will burst and the resulting appearance will not be very pleasing.
13. Coat the exterior with caster sugar, stamp patterns on the surface with cookie cutters or decorate as desired. Leave doughs to proof for the second time for about 40 ~ 50mins.
14. Bake in pre-heated oven at 170 deg C (325 deg F) (I set mine as 180 deg C (350 deg F) for 10 ~ 12 mins. Note: mine took 20mins to brown!
Enjoy!

Japanese Melon Pan
Ingredients:
(makes about 12 buns)
Bread Dough:
300g bread flour (3 cups)
6g instant yeast (1 tsp)
36g caster sugar (3 TBS)
5g salt (1 tsp)
6g skim milk powder (2 1/2 tsp)
200g warm water (3/4 cup + 1 1/2 TBS) (37~38 deg C) (I didn't bother, just made sure water is not cold)
30g unsalted butter (2 TBS) (bring to room temperature)
Pastry layer
80g unsalted butter (5 1/2 TBS) (bring to room temperature)
90g caster sugar (1/4 cup + 3 1/2 TBS)
80g egg, lightly beaten (1/4 cup + 1 1/2 TBS) (oh, I hate weighing eggs!)
200g cake flour (2 1/4 cup)
2g baking powder (1/2 tsp)
some melon extract (or vanilla extract) (I leave this out as I don't have this)
some caster sugar for dusting/coating
How I made them:
1. Sift bread flour, caster sugar, salt, milk powder into a mixing bowl. Add in instant yeast and mix the powdered mixture a little.
2. Add in warm water. DO NOT add in all the water at one go, leave a little bit so as to adjust the texture of the dough.
3. Mix the ingredients with hand and slowly form into a dough. Add the remaining water if it is too dry.
4. Transfer dough to work surface. Knead until the dough longer sticks to the work surface. This should take about less than 5 mins.
5. Flatten the dough and add in the butter. Continue to knead. Initially, the dough will be very oily, after a few kneads, the butter will be absorbed by the dough. Continue to knead until the dough no longer feel sticky to your hand and will not stick to the work surface. This should take about 15 to 20 mins.
6. Place dough in a lightly greased (with butter) bowl, cover with cling wrap and let proof for about one hour, or until double in bulk.
7. While the dough is proofing, prepare the pastry layer. With an electric mixer, beat butter and sugar until mixture turns pale.
8. Add in a few drops of melon extract if desired.
9. Add in lightly beaten eggs in 3 addition. Beat well after each addition.
10. Sift over cake flour and baking powder. Mix with a spatula until flour mixture is fully incorporate. Divide into 12 portions, about 35~40g each. For the chocolate chips version, wrapped some chocolate chips into each pastry dough. (Feel free to experiment. I like adding shredded coconut into mine.) Place in a tray and let the dough chill in the fridge for at least 30 mins.
11. Punch out the gas in the bread dough and divide into 12 portion, about 45g each. Roll into rounds. Cover with a damp cloth or cling wrap and let the dough relax for 10mins.
12. Remove chilled pastry dough from the fridge. Roll out each dough in between 2 layers of cling wraps (I used clear plastic bags). Roll the bread dough again into rounds again. Remove the top layer of the cling wrap and place the bread dough onto the pastry dough. With the bottom layer of the cling wrap still intact, wrap the pastry dough around the bread dough. Carefully remove the bottom layer of the cling wrap, at the same time, smoothing the edges of the pastry dough. NOTE: DO NOT cover the Entire bread dough with the pastry dough. Leave the bottom 2 ~ 3 cm uncovered. The dough needs the space to expand, otherwise the pastry dough will burst and the resulting appearance will not be very pleasing.
13. Coat the exterior with caster sugar, stamp patterns on the surface with cookie cutters or decorate as desired. Leave doughs to proof for the second time for about 40 ~ 50mins.
14. Bake in pre-heated oven at 170 deg C (325 deg F) (I set mine as 180 deg C (350 deg F) for 10 ~ 12 mins. Note: mine took 20mins to brown!
Enjoy!
Tuesday, May 11, 2010
Dora Yaki どら焼き

It's been awhile since any recipes have been posted but here is a recipe for Dora Yaki or Japanese pancakes. You don't but syrup on them or anything, they just resemble pancakes except they are a lot sweeter. We made these at a Japan Club activity and they were a big hit. We almost didn't have enough for everybody! If you have any questions feel free to post comments.
Dora Yaki どら焼き
Ingredients:
• 3 eggs
• 2/3 cup sugar
• 1/2 tsp baking soda
• 3 Tbsp water
• 1 cup flour, sifted
• 3/4 lb sweet azuki beans
Directions:
Put eggs and sugar in a bowl and whisk very well. Dissolve baking soda in water. Add the water in the egg mixture. Add sifted flour in the egg mixture gradually. Heat a skillet or hot plate and lightly oil it. Pour a scoop of the batter into the skillet and make a small pancake. Turn over when bubbles appear on the surface. Repeat this process to make 8-10 pancakes. Cool the pancakes. Divide pancakes into pairs, matching size and shape as best you can and put a 1 1/2 Tbsp (or an amount to your liking) red bean paste between each pair. Slice in half before serving.
Makes about five 4" dorayaki cakes or ten 2.5" cakes.
A note about the recipe: If you're used to making typical pancakes, it tempting to want to let these cook on the first side until bubbles appear and the sides of the top start to dry out. With dorayaki pancakes, do not wait for the sides to dry out or the pancake will most likely burn. Be sure to flip them once the surface becomes bubbly.
Because of the moisture still present in the edges, these are a bit tougher to flip than breakfast pancakes. The easiest way I found to do this while preserving the round shape of the pancake was to slide a spatula under the pancake slightly, lifting it up enough to fit a chopstick underneath it. You can then lift the pancake with the chopstick, allowing you to slide the spatula far enough under the pancake to flip it properly.
Wednesday, March 10, 2010
Oyakodon
Jessica here. Today, I used my wiles to convince Staci and Jamie to come over after class and make Oyakodon (親子丼) with me. In Japanese, "oya" means "parent" and "ko" is "child," so "oyokodon" basically means "Parent and child donburi." It consists of chicken and egg. Pretty cute, huh?
This recipe is pretty easy, although not super speedy. I modified it slightly off of an English recipe I found via google. So here it goes:

Oyakodon 親子丼
makes about 4 servings
1 large or medium sized onion
2 small chicken breasts, or one large chicken breast
about 1/4 head cabbage, chopped medium (optional)
Dashi (fish stock- I dissolved about 1 Tbsp in 1 1/2 cups of hot water)
4 Tbsp Soy Sauce
2 Tbsp Mirin
1 Tbsp Sugar
2-3 eggs (or to match preference) mixed slightly
---
about 2 cups rice
1. Slice onion. Add 2 Tbsp of oil to the bottom of a pot; heat over medium-low to medium heat. Add Onions in one layer on the bottom of the pan. Don't stir them, just let them sit there and begin to cook. They'll be there for a while, so make sure the heat isn't too high or they will burn.
2. Cut your chicken into small cubes-- about 1/4 inch cubes are good. If they seem really small to you, don't worry. It's better they be a little too small than a little too big. Place chicken in a layer over the onions.
3. Mix your wet ingredients together: Dashi, Soy Sauce, Mirin, and Sugar. Pour the sauce over the chicken and onions-- aim to cover the chicken so everything cooks through. (If you don't have enough sauce to cover the chicken, you can cover the pot for a bit while cooking to ensure the chicken on top is cooked).
(Now's a good time to start the rice-- cook according to your rice's directions!!)
4. Bring mixture to a boil and simmer until reduced by about half. Now's the time to add the cabbage, if you so desire (I like cabbage in mine!) The cabbage will cook down a lot so don't worry if it looks like a lot. Let it simmer for a while longer, until much of the liquid is gone.
5. Pour your lightly mixed egg on top and cook until it reaches your desired cooked-ness. In Japan, the eggs are usually left pretty raw and runny, but if you want yours more cooked that is totally okay! Oyakodon on top of it. With this recipe, I usually make about 4 servings, so just cut the pan into fourths and dish out the goodness.
This recipe is pretty easy, although not super speedy. I modified it slightly off of an English recipe I found via google. So here it goes:
Oyakodon 親子丼
makes about 4 servings
1 large or medium sized onion
2 small chicken breasts, or one large chicken breast
about 1/4 head cabbage, chopped medium (optional)
Dashi (fish stock- I dissolved about 1 Tbsp in 1 1/2 cups of hot water)
4 Tbsp Soy Sauce
2 Tbsp Mirin
1 Tbsp Sugar
2-3 eggs (or to match preference) mixed slightly
---
about 2 cups rice
1. Slice onion. Add 2 Tbsp of oil to the bottom of a pot; heat over medium-low to medium heat. Add Onions in one layer on the bottom of the pan. Don't stir them, just let them sit there and begin to cook. They'll be there for a while, so make sure the heat isn't too high or they will burn.
2. Cut your chicken into small cubes-- about 1/4 inch cubes are good. If they seem really small to you, don't worry. It's better they be a little too small than a little too big. Place chicken in a layer over the onions.
3. Mix your wet ingredients together: Dashi, Soy Sauce, Mirin, and Sugar. Pour the sauce over the chicken and onions-- aim to cover the chicken so everything cooks through. (If you don't have enough sauce to cover the chicken, you can cover the pot for a bit while cooking to ensure the chicken on top is cooked).
(Now's a good time to start the rice-- cook according to your rice's directions!!)
4. Bring mixture to a boil and simmer until reduced by about half. Now's the time to add the cabbage, if you so desire (I like cabbage in mine!) The cabbage will cook down a lot so don't worry if it looks like a lot. Let it simmer for a while longer, until much of the liquid is gone.
5. Pour your lightly mixed egg on top and cook until it reaches your desired cooked-ness. In Japan, the eggs are usually left pretty raw and runny, but if you want yours more cooked that is totally okay! Oyakodon on top of it. With this recipe, I usually make about 4 servings, so just cut the pan into fourths and dish out the goodness.
Subscribe to:
Posts (Atom)